his last installment of the photo series on Tasmania is about its dramatic coastline. Here are some images taken in Tasman Peninsula, with spectacular views across to Cape Pillar, Cape Raoul, a late night shot of the famous Remarkable Cave and a view of Crescent Bay and its beautiful beach from above Mt. Brown.
The first two shots used a Galen Rowell’s Graduated Neutral Density Filter (3 stops, soft edge) from Singh Ray to tame sky highlights and balance the foreground. The Remarkable Cave shot was taken late at dusk and needed a 6 sec exposure on a tripod to get enough light and, at the same time, soften the texture of the waters coming into the cave.Read more...
Melbourne-based performing arts company “Stange Fruit” appeared at the Chinese New Year celebration in Singapore’s China Town on January 27, 2011. Perched atop 5-metre high flexible poles, the troupe bends and sways in the air at pace with intriguing bits of new-agish music. The first half of their 25 minute performance at thet heart of Singapore’s China Town is shown here, captured with the EF 24L II lens wide open on the EOS 7D.Read more...
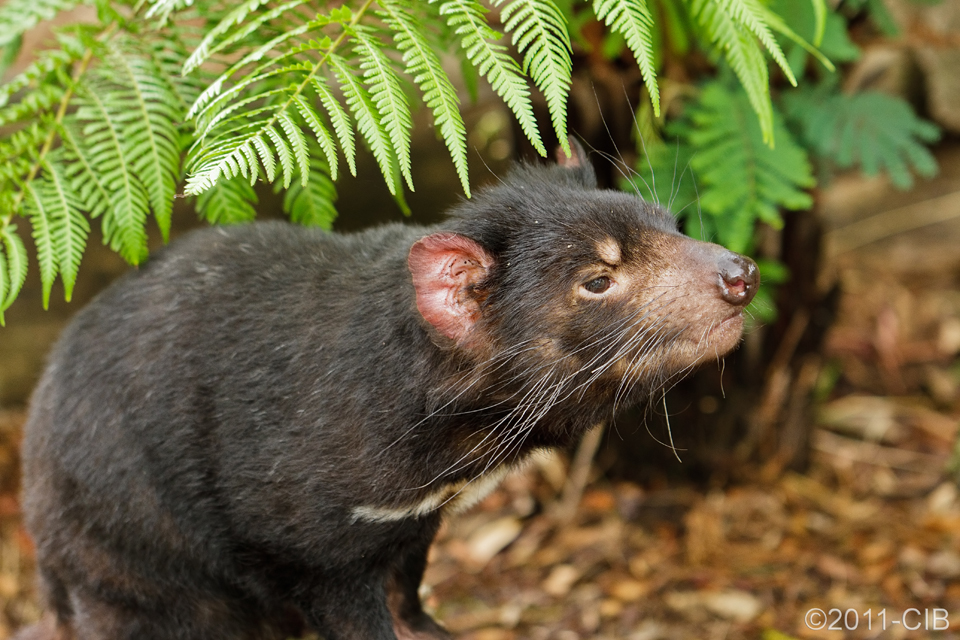
Not unusual to encounter a great variety of marsupials in Tasmania, particularly if you find yourself in a nature park, such as the Bonorong Wildlife Sanctuary. A prime example of true Tasmanian fauna, the famous Tasmanian Devil, is not as devil-looking as one might think, here caught sniffing out the mid morning air.
Tasmanian Devil
Spotted-Tail Quoll
Koala
Kangaroo portrait
A Spotted-Tail Quoll run frantically in circles around his domain. A Koala, quite a bit calmer by nature, stared flematically at some point in the distant horizon from a vantage point by his favorite tree.
And, of course, the ubiquitous kangaroo, or at least one of the many varieties of it. Here in a close-up portrait, with his own body bokehing away in the background.Read more...
Tasmania is truly a photography paradise. The Mount Field National Park offers endless opportunities with amazing greenery and breathtaking waterfalls. Here a few examples, starting with the iconic Russell Falls.
Russell Falls
MOUNT FIELD NATIONAL PARK
MOUNT FIELD NATIONAL PARK
An exposure of 0.5 to 1.0 seconds, like those shown here, makes the falling water silky smooth, strengthening the sense of movement. In plain daylight, however, such exposures would clearly result in a totally blown-out image. A neutral density (ND) filter can be used to diminish the light getting into the camera and so allow longer exposures in bright natural light. The Vari-N-Duo from Singh-Ray combines a neutral density filter adjustable from 2 to 8 f/ stops and a warming/polarizer in a compact and convenient design. The desired amount of density can be dialed to achieve a proper exposure. The combined warming/polarizer reduces glare from sky, water, wet rocks, and other reflective surfaces and enhances color saturation for added drama. Polarization can be easily controlled by rotating the ring just behind the min/max ND ring. A sturdy tripod is a must, obviously.Read more...
Mount Kinabalu lies in the Malaysian province of Sabah in the island of Borneo. At 4,095.2 meters over sea level, its summit on Low’s Peak is believed to be the highest peak in South East Asia.
It does not require specialized skills or equipment to climb Kinabalu, as I did on May 5 this year of 2011. A good physical condition and a bit of psychological preparation will do. A guide is assigned to the climber(s) when these enter the national park. This could be avoided, I gather. My guide, a young boy from the village, was pretty useless, primarily because of his limited (or non-existing) knowledge of English. He limited himself to walk a distance behind me texting with his girlfriend on his mobile phone. It is important to climb with a light luggage and there is fine balance between having the right amount of extra cloth and carrying a really heavy backpack. After gathering some information on the web I opted for a set up that proved very good. A light water-proofed jacket is a must. Mine was from Patagonia and could be squeezed down to almost nothing. I had with me a pair of convertible trousers, two t-shirts (one long-sleeved), long under trousers, two pairs of gloves (regular sturdy gloves and liner gloves), a cotton high-neck sweater, a skiing hat and good and sturdy hiking shoes with hiking socks. I started the climb on shorts and a t-shirt. I put on my jacket when a shower came. Also important to have is a head-lamp (you’ll really need it for the final climb!). I also packed with me 6 energy bars and a bunch of nut/fruit bars as well. A half-liter (at least) bottle for water is also necessary. It can be refilled along the way. All this, plus my gripped EOS7D with the EF-S 10-22mm wide angle zoom lens found room in the 200AW slingshot from Lowepro. The set up was perfect, as I later found out.Read more...
Sungei Buloh is a wetland nature reserve in the North of Singapore, across the strait that separates the island from the South coast of the Malay peninsula. It is home to a wide variety of migratory birds like the Great Egret shown here on the mud left after a low tide. (Note the walking fish on the background!).
It was a hot and sunny day, but we spotted plenty of birds.
Follow the link HERE for more photographs from the Sungei Buloh reserve, including close-ups of Grey Heron, Yellow-billed Storks, Black-naped Oriole, Redshank, White collar King Fisher and Purple Heron. All taken with the EOS 7D and the EF 100-400L telephoto zoom.
At Saariselka, a small village of 300 inhabitants 250km above the arctic circle in the Finnish tundra, Northern Lights can be seen over 200 days per year. They could also be seen during three spectacular nights spent this past March, right after the equinox, a good time to spot this amazing phenomenon. A 5D MarkII was rented for the occassion along with the 16-35mm f/2.8 L II wide angle lens. Most of the pictures, however, came out best with the 24 f/1.4 L II , which allowed shorter shutter times and greater texture in the sky.
Northern lights at Saariselka, Finland
Northern lights at Saariselka, Finland
Northern lights at Saariselka, Finland
Exposures varied anywhere from 6 to 30 sec with ISO maxed at 800. Apperture was always maxed at whatever the lens could deliver. Tripod, cable release and mirror lock-up were used at all times.Read more...
Here are some astonishing examples of high-end Japanese cousine from the selection available at Takumi Tokyo, a fashionable restaurant of traditional Japanese ambience, elegantly decorated in Chanto style, overlooking Singapore’s Keppel Bay. The restaurant specializes in Teppanyaki (iron plate), Robatayaki (charcoal grill) and sashimi. All fresh ingredients are flown regularly from Japan; fish and sea food twice a week straight from Tokyo’s Tsukiji Market.
The photographs were taken with Canon EOS 7D and the EF 24mm f/1.4 L II lens using available light. They attempt to capture the freshness of the ingredients as well as the subtleties of composition and presentation of the dishes.Read more...
Scenes with very high dynamic range (containing very bright and very dark sections) are difficult to capture in a single shot without either blowing out the highlights or underexposing the shadows. Although common sensors in current DSLRs have 7 to 8 stops of dynamic range, many natural scenes would normally have a much greater dynamic range, too large to be captured accurately, even though they would look perfectly normal to our eyes. This is because each photoreceptor in the retina can adjust its gain independently (or almost independently) of each other, while an ISO setting in the camera applies equally to all pixels in the sensor. HDR imaging is a way to extend the dynamic range of a capture by taking sequential exposures of the same scene with bracketed settings. High-end DSLR cameras can do this automatically after dialing in the desired bracketing sequence and interval. Typically one shot is taken at the “correct” exposure indicated by the metring system, while additional shots are taken above (say +1, +2 or +3 EV) and below (say -1, -2 or -3 EV). The trick is to get all highlights and shadows correctly exposed in at least one of the exposures in the series. The images in the series are then combined to generate an HDR image using specialized software. Later editions of Adobe Photoshop can do this. Dedicated HDR software, such as Photomatix, is however easier to handle and yields very nice results.Read more...
Here is one classic Pompei shot with Vesuvius in the back. Midday sun, crowds all over the place, too bright sky, poor contrast:
Cropping (in Camera Raw) allows focusing on the center temple and eliminates the worst part of the crowd:
Here is the Raw conversion: mainly tone curve for added contrast, graduated filter to pull back the sky and adjustment brush to bring back top of the building and columns that were too dark after the grad filter:
Here are the histograms before (left) and after (right):
One final clone tool in Photoshop removes the unwanted visitors. Voilá:


